Tips for Packing Up Your Home

moving-boxesMoving can be a very stressful time with finding your next home to packing up your belongings and then moving day. It can definitely be overwhelming but the tips below may help the process going a little smoother.  Find out how to get organized, what supplies you need & how to pack certain items.

Get organized ahead of time.  Don’t move anything that you no longer need.  Get rid of old clothes, furniture & possessions you don’t use  Why move things from one place to another if you are going to just throw them out later.

Buy your supplies.  You will want sturdy packing tape, different sized boxes, something to label each box with.

Packing tips.  Don’t make your boxes weigh more than 50 pounds.  Pack heavier items at the bottom.  Make sure boxes can be closed securely and are flat so you don’t damage any contents and you can stack the boxes.  Smaller/loose items should be packed into a bag or smaller box and then placed into a bigger box.  Clearly label each box.

How to pack and prepare major appliances.  These are a little more difficult due to how heavy and awkward they are plus they need uninstalled.  You may want to contact the dealer of the appliances to see if there are specific instructions you should follow.  You can also go to Appliance411.com to find or order a manual.  For all appliances secure the electrical cord to the back with packing tape so they don’t dangle.  Also, tape doors & lids shut.

Packing pictures, frames & mirrors for safe travels is important.  You don’t want broken glass, chipped corners or tape damaging the surface.  Find a box that is bigger than the item.  Break the box down so it is flat & tape one end securely.  Wrap the frame with bubble wrap and carefully slide it into the open end of the box.  Seal it securely and label FRAGILE with the location – kitchen, bedroom, living room, etc….

Do It Yourself Landscaping

easy-front-yard-landscapingAre you looking for ideas to spruce up your yard? Do you want to add some color or do a complete makeover? There are many variables to consider in do-it-yourself landscaping, such as budget, skills, how you plan on using your yard, personal tastes, etc. Before you start buying & digging, do your research on which plants you like and which would work best for your landscaping plans. Below are some tips to help get you started.

  • Flowers always make a home seem more welcoming. Planting assorted annuals and perennials at your homes entrance help keep color all year long.
  • Use Evergreens and other Foliage plants for continuity. Deciduous trees and shrubs provide more color and variety while the evergreens give you a year round show.
  • Add dimension to your yard with elevated planters and hanging baskets. Plants appreciate the good drainage & aeration that raised planters provide.
  • Layer flower beds when planting. Use 3 rows with the back row being the tallest plants, a middle row with the next tallest, and front row has the shortest plants. Using repetition throughout all of your landscaping helps provide unity.
  • Before you begin landscaping your backyard decide how it will be used. Is it a children’s play area, a pet’s outdoor residence, a peaceful place to sit and relax, a place to grow a vegetable or flower garden? Knowing how you will utilize this space will help you decide what you want to do with the backyard.
  • Install water features for a good focal point. Water features aren’t only visually appealing but also give you soothing sounds. Water features can be ponds, fountains or even a waterfall.
  • Make your life easier with a low-maintenance yard. When you are purchasing plants for your yard, don’t forget to be sensible in planning for its maintenance. If your yard causes too much work you will resent all that you did to make it beautiful. Plan your design for the level of maintenance you are willing to do.

Energy Saving Tips

ThermostatIt’s that time of year where the summer heat brings higher electricity bills. Energy prices have been on the rise and are expected to increase by about 13 percent come 2020. Here are a few simple tips to help bring down costs this summer season:

  • Set the air conditioner thermostat as high as comfortable – recommend 78* or higher when you’re home and 85* when you are gone.  Install a programmable thermostat and have it set so you don’t have to remember to make adjustments 2 or more times a day.
  • Keep the blinds and windows closed during the day and open at night.
  • Ceiling fans are also low-cost ways to keep your home a little cooler.
  • Minimize indoor heat: run the dryer and dishwasher at night on hot days. It’s best to avoid the use of major appliances between 2 and 8 p.m.
  • Clean out air conditioner filters once a month. If they are covered in fuzz and dust, they can’t cool the air as well.
  • Look for leaks and cracks in your home. Make sure your house is properly sealed in order to keep the cool air in that you are paying for.
  • Unplug appliances and electronics and use power strips. All of the small appliances and gadgets you leave plugged in during the day are increasing your utility bills. Use one power strip with about five or six different gadgets plugged in. When you leave for the day you can turn the entire strip off.

Homes that have an “incurable” defect

What feature/features would you not compromise on when you are shopping for a home?  Do you think about this question before you start looking for a future home?  The purchase of a home will likely be one of your biggest investments ever.  It is important for you to look closely to be sure it is the wisest place to invest your money.  There are homes that have “incurable defects.”  These are things that no matter what you do to improve and update the home these problems will never go away.  Incurable defects can affect the resale value of a home as compared to other properties in the neighborhood.  Such a property will be on the market longer and the offers will be lower and so might the appraised value. Here are some examples of incurable defects…

Bad Location

  • On or near a busy road/intersection
  • Railroad tracks nearby
  • Proximity to commercial/industrial buildings
  • Proximity to apartments and government housing
  • Noise pollution
  • Wind pollution such as odors from neighboring farms or factories

Bad Layouts

  • Narrow doorways and halls
  • Adjoining bedrooms
  • Awkward floor plan
  • A lot of stairs
  • Location of main bathroom
  • Dining room in center of home

If a home you are considering buying has a price that seems too good to be true, perhaps you should look a little closer.  Make sure that your hard earned money is being invested in the home that is best for you and offers a good potential for resale.

How to Make the Most Out of a Small Kitchen

Image

Are your kitchen cupboards and drawers so full they are about to burst?  Do you keep family and friends away because you feel there is just no space to entertain?  No matter how much space you have, there are many space-saving solutions for smaller kitchens.  Try some of these tips for making the most out of your space:

1. If you can, open up walls that separate the kitchen from other areas of the house. This will make the kitchen feel more roomy.

2. Go to the ceiling with storage.  Put items that you don’t use on a regular basis on the top shelves.

3. How do you store your food?  Are there decorative containers that you could use that allows you to display them on the counter and not have to be hidden in a cupboard.

4.  Organization – Make the kitchen efficient by placing appliances within a few steps from one another.  Don’t forget that you can use your walls as storage also.  They are perfect to hang pots & utensils.

5. Use clean colors.  They make any small space appear bigger.

6. Movable islands are a great way to add counter space and storage.  When it is time for an event you can move it into another room.

7.  Store bigger items that you rarely use in other parts of the house.

8. If there are windows, emphasize them!  Natural light is great!


Make the most out of that first impression

ImageIn this internet connected age, over 90% of home buyers look at online listings before they even consider seeing a house in person.  Posting good quality, nicely staged & de-cluttered photos are very important.  That doesn’t mean that you need a professional photographer or stager to prepare your home.  With a simple camera that produces high-quality photos and a little practice, you can take listing photos that will highlight the selling points of a house & get it off the market quicker.

Good lighting:  Take photos during the day when there’s as much natural light as possible.  Turn on lights, open up curtains and blinds.  Take the photo from the best angle possible getting the brightest and clearest view of a room.

No clutter:  Pick up your house before photos are taken.  Clear off counters, tables, beds and floors of all clutter and personal items – especially the refrigerator.  Clutter can be a distraction so make sure you take a step back and assess the room before photos are taken and put online for the viewer to see.

Staging:  Try to look at your home through a buyers eyes as though you’ve never seen it before.  Is there any painting that needs done?  Are there items/furniture that could be removed from a room to make it look larger?  Create a focal point for each room.

Match the photos to the listing’s description:  If your listing describes custom cabinets, a lake view or some amenity that may entice a viewer, include a photo.  Great descriptions are helpful but seeing photos are even better!  Showing the best qualities of your house is important.

More photos, more views:  Listings that have 10+ photos receive 2-3 times more page views compared to listings with just one photo.

Keep pets & people out:  Although that dog, cat or baby may be a cute addition to your photo, it is best to keep them out.  When people show up in a photo that tends to be all a person sees.  Pets can be a turn off to some people as they can assume there may be smells, stains or damage that comes with your furry friend.

4 common mistakes made by home sellers

Cluttered Room

The harsh winter weather is making way for the much-anticipated signs of spring, a season many agree is ideal for selling homes.

That’s great news if you are ready to put your house on the market. But is your house really ready to be in the spotlight?

Timing is everything, but not without preparation. In fact, it’s your responsibility to position yourself and your house to get the best price possible.

And it might just pay to consider these potential pitfalls so the offers do, in fact, roll in.

#1: Not pairing with the right realtor
Your real-estate agent will take you through the stages of the home-selling process — listing, showing, negotiating and closing.

Be sure to choose a full-service firm that is established, respected and professional. Your agent should be knowledgeable of your market so he or she can, well, successfully market your property.

Also make sure the agency is technically savvy and has a track record of posting full and accurate listings, complete with flattering property photos.

#2: Not facing facts
Speaking of photos, have you looked closely at your home lately?

It’s crucial that you take a fresh look at your property, outside and inside. Be brutally honest, but don’t take it personally. Simply gather–and face–the facts regarding its strengths and weaknesses. Only then can you make a plan to maximize your offering.

Start with appointed, calculated walk-throughs/walkabouts … perhaps with the help of family, friends, neighbors, or professionals. Maybe begin with a formal inspection.

Essentially, note any structural, functional and aesthetic flaws. Then figure out what needs fixing, distracted from, refreshed, updated, added and/or removed.

Outside
Curl appeal is important because neglected or outdated designs and features on the outside can suggest the same on the inside. And anything a potential buyer sees and doesn’t like during a drive-by or an online viewing could eliminate your property from further consideration, such as:

      • poor conditions of shrubs/trees/plants, potted plants
      • out-of-season or abundance of yard/door decorations
      • damaged or insufficient lighting
      • insufficient, inappropriate window coverings as seen from the outside
      • poor conditions of gutters/roofs
      • cluttered porches/patios/play areas/driveways
      • unsanitary garbage areas

Inside
Once you get potential buyers inside your home, you want to keep the focus on the potential of the spaces to meet their needs. You do not want to make it easy for them to get stuck on things that likely aren’t deal breakers, like:

      • simple yet needed repairs
      • poor flow of space due to arrangement or abundance of furniture
      • not showcasing natural lighting features of home
      • clutter
      • too much personalization
      • uncleanliness
      • unpleasant odors

#3: Not doing — or hiring out — the work
Now that you know what you’re working with, flaws and all, it’s time to do the work. Again, ask for help if you need it, from painters, plumbers, electricians, designers, even landscapers.

Fix what can be fixed within reason (i.e. your budget and time constraints) and play to the strengths of all else.

When you think you’re finished, remember to maintain the home’s condition for showings and open houses. Also work with your agent at being flexible and available so as to accommodate the schedules of potential buyers.

#4: Not seriously considering first offers
A major mistake of sellers regarding pricing is to initially focus on what they need to net from their home versus what the home is worth.

However, if you and your realtor have priced your house right as well as positioned and showcased your house appropriately, all offers should be reasonable and therefore taken into consideration. Especially the first ones, according to many in the industry.

Serious buyers, sometimes called Real Dealers, are pre-approved, continually scanning the local listings, and possibly in touch with agents who are on the lookout just for them. So if your house is priced right and meets a buyer’s criteria, that early –if not first — offer may be worth a second look.

3 Tips for Meeting Your New Neighbors

meeting your new neighbors

Moving into a new neighborhood can be a daunting experience, especially when it comes to meeting your new neighbors. In a digital society that has become increasingly anti-social, starting a conversation with strangers might seem intimidating.

Here are three easy tips for getting to know the neighbors around you.

#1: Remember that you have a common ground.
Living in the same community with someone automatically gives you something to talk about and bond over. You can talk about the best restaurants in town, good places to take your children to play, or even advice on how to handle the more eccentric members of your neighborhood.

Knocking on the door of someone that you’ve never met under other circumstances might seem awkward, but remember that you have a very valid reason for wanting to meet them. More than likely, your new neighbors are just as anxious about meeting you, so taking the first step will already be helping to break the ice.

#2: Have a small house warming party.
If you’ve just moved in, you’ve likely already got a lot going on. You’re unpacking, arranging furniture, changing your mailing address, and a million other things. Throwing a party might be at the bottom of your to-do list. We’re not suggesting that you do it right away, necessarily, but at some point after things settle down, you might consider having a very small, informal gathering as a way of getting to know your neighbors.

Inviting people to your party gives you another valid reason to knock on doors and introduce yourself. Your neighbors might feel more comfortable meeting you in a group setting, with other people that they know, so a party is a perfect solution.

#3: Make yourself available.
If you’re just not comfortable with the idea of making the first move, there is always the more passive option of letting your new neighbors come to you. They likely want to meet you, but might have the same anxieties that you have. Try making it easier on them by being available for interaction.

A few things you could try include: going for regular walks, sitting on your front porch or patio, or doing yard work during times when other people are out and about. If you have a garage attached to your house, avoid using that entrance exclusively, so that your neighbors can see you outside of your car.

We hope that these tips have helped. Do you have any tips to share? We would love to hear about your experiences meeting new neighbors. Please leave us a comment in the space below!

3 Questions To Help You Choose the Perfect Snow Shovel

Snow Shovel

Isn’t snow shoveling a blast?

Okay, maybe it’s not quite as fun as we’d like it to be, but the good news is that getting the right kind of snow shovel can help. Not all snow shovels are created equal, and finding the right one for you can be a bit tricky, because there are more factors involved than you might think.

Here are three things to keep in mind when you start shopping for a snow shovel:

#1: How much shoveling are you actually going to do?
If you have a snow blower, or some other heavy duty snow removal equipment at your disposal, then you will want a different kind of shovel than someone who doesn’t.

If you’re only planning on shoveling light snow, or pushing off the snow that has accumulated on your deck, then an industrial-strength shovel may not be your best option.

If you know that you will be shoveling all of your snow by hand, however, then you will really want to think about investing in a stronger model. Something that will withstand constant use, but is lightweight enough not to break your back.

#2: What part of shoveling is most difficult for you?
We’ve all got our own weaknesses, and it’s important to keep that in mind when choosing a shovel. If you’ve got a bad back, then an ergonomic shovel might be best for you.

The handles are specially designed to reduce bending, but they may require adjusting your usual technique for pushing and throwing snow.

If your bodily concerns have more to do with your arms than your back, then you might want to pay more attention to the scoop of your shovel. Big scoops can come in handy, but they also hold a lot of snow, which can make your shovel harder to lift.

#3: What do other people say?
This day in age, finding out if a shovel would work for you is as easy as typing a few words into your favorite search engine. Most sites ill allow you to read reviews from people who have first hand experience with the product, ask questions in comment sections and forum pages, and compare brands side by side.

You can also go the more old-fashioned route and ask the staff at your local hardware store. Not only are they knowledgeable about their products, but they have the experience of listening to their customers and helping them find what they want.

What does the perfect snow shovel look like to you?

12 Interior Design Trends for 2014

Interior Design Trends for 2014: Fragmented

Photo Source: Fractal Group LLC

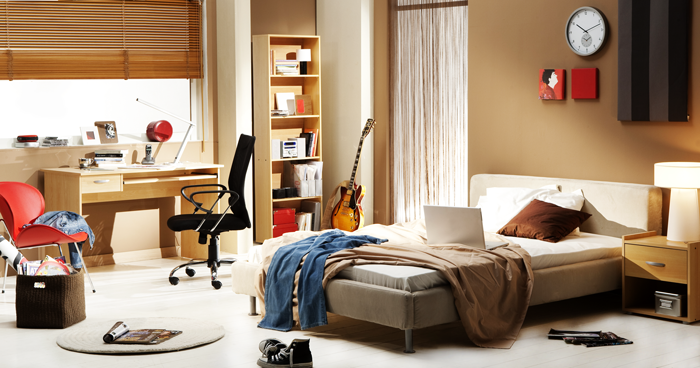
With the newness of 2014 slowly ebbing away, now is a great time to redesign your home to keep things feeling fresh. This is especially true if you’re planning on selling your home later this year. Making a few changes here and there can make your home appear newer and more trendy, which can attract buyers.

Here are 12 tips from interior design experts on what’s hot this year.

Color and Tones

Trend #1: Radiant Orchid
Pantone’s official color of 2014 is making a splash with interior designers everywhere, and despite it’s fun and flirty name, it is surprisingly versatile. You can go all out, or just use a little bit, and still be on-trend.

Trend #2: Blue and Green Accents
If Radiant Orchid isn’t your thing, blues and greens are also hot in 2014. If painting your walls is a bit too bold for you, changing your pillow covers or curtains might be a more subtle way to work these colors into your decor.

Trend #3: Yellow, Khaki, or Red
Those who aren’t fans of bright, bright colors can rest easy. Other, more laid back, colors are still in style, such as khaki and red, both of which pair well with certain blues, in case you still want to try them out. Yellow is surprisingly huge this year.

Trend #4: Deco hues
Also in contrast to the bright color trend, a lot of decorators are still leaning towards more muted colors, such as rose quartz, amethyst, and raisin. Or, as Los Angeles designer Michael Berman describes, “Colors that appear to be filtered through smoke and sunlight.”

Patterns and Shapes

Trend #4: Circles
Circles are making a strong comeback this year. According to decoist.com “Anything that can be round, will be round.” You can work circles into your home in a variety of ways: mirrors, rugs, wall art, dishes, accessories, and more.

Trend #5: Fragmented
Symmetry is becoming a thing of the past. In 2014, it’s all about fractures and fragments, pieces that looked sliced, diced, or blown to bits.

Trend #6: Geometric and Floral Patterns
These patterns haven’t gone out of style since last year although in 2014, there is an emphasis on taking it easy with these types of prints. Experts recommend introducing these patterns with soft furnishings like throws, rugs, and pillows.

Materials and Fabrics

Trend #7: Wood
2014 is the year of the Wooden Horse, which means that natural elements are trendy right now, including wood materials and textures. This can come in many forms, such as bamboo, sculptured driftwoods and untreated wood. These textures bring a sense of warmth and harmony to any room.

Trend #8: Macramé and Fiber-Art Wall Hangings
This textile-knotting trend is a blast from the past. Last popular in the 70’s, it is making a strong comeback in 2014 in the form of wall hangings. It’s a great way to add texture to a room without spending a ton of money on expensive art.

Trend #9: Window Sheers
The dark ages are over – it’s time to let in some light with sheer window panels. Replace your heavy drapers with something a little more transparent. And remember that sheer doesn’t have to mean polyester. Look for richer materials, like linen and wool. Add pleats to make them a bit more masculine.

Styles and Periods

Trend #10: Scandinavian
This look is still popular for 2014, because it mixes a lot of the other trends we’ve discussed: natural materials, bright colors, and bold statements. The trick to pulling off a look like this is to avoid clutter and not over-do.

Trend #11: Venetian
Another interesting period trend for 2014, is the romantic, venetian look of marbled-paper. You can see this in wallpaper, linens, and porcelain.

Trend #12: Neoclassical, With a Modern Twist
This trend is inspired by Greek and Roman themes, with a modern update that will appeal to those with more classic tastes. Achieve this look with busts and sculptures, murals with a traditional touch, and symmetrical arrangement.

What interior design trends are you most excited about?